
Git 시작하기 4 (Github 가입 및 Atom 연동하기)
사용 버전: Atom 1.43.0 x64
운영체제: Windows 10 Home x64 1909
기획: Atom으로 Git 사용하기.
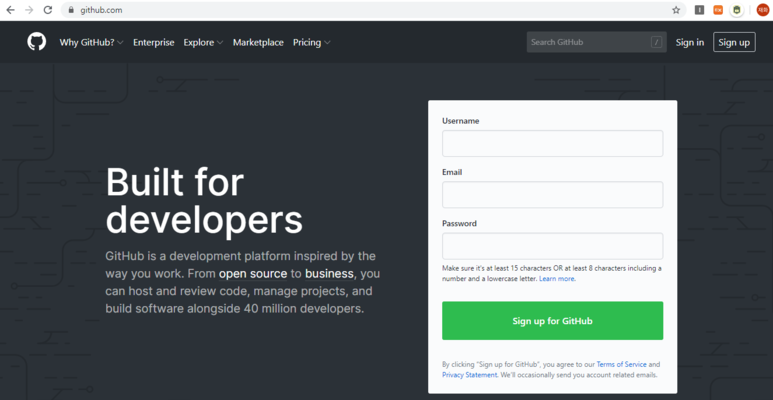
github 공식 홈페이지에 접속합니다.
https://github.com/
아이디가 있으면 Sign in, 아이디가 없으면 Sign up을 눌러줍니다.
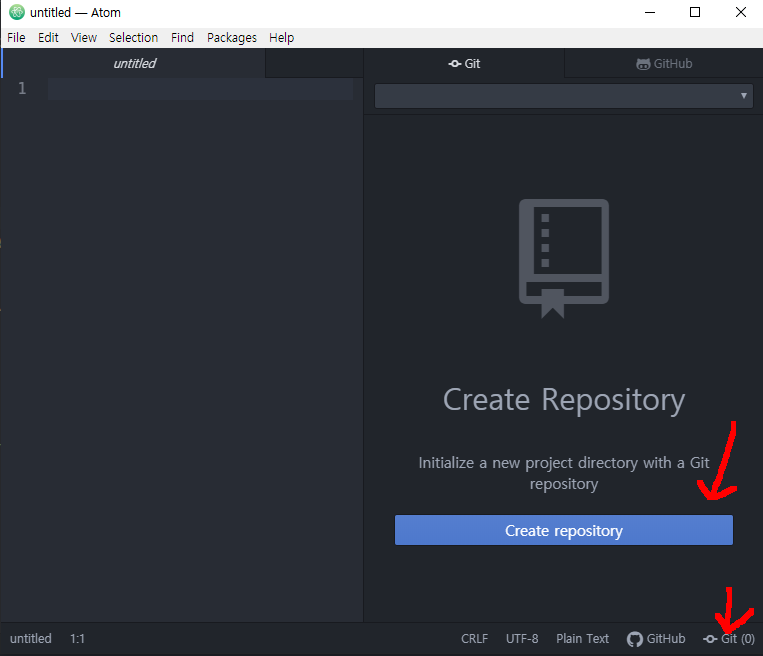
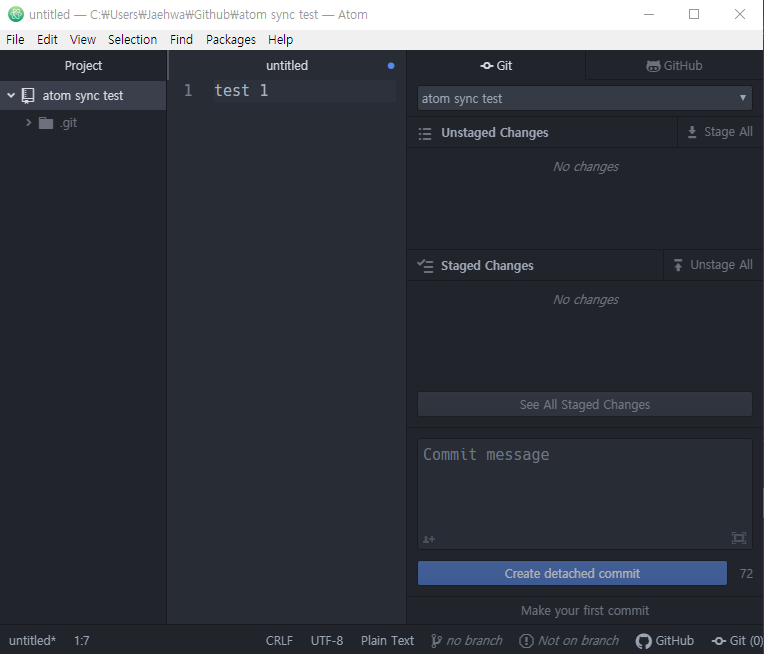
Atom으로 돌아옵니다.
Git을 누르고, Create repository를 누릅니다.
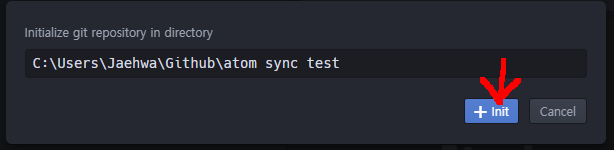
적당한 폴더를 만들고, 경로를 입력합니다.
잠시 후, 로컬용 Git이 만들어집니다.
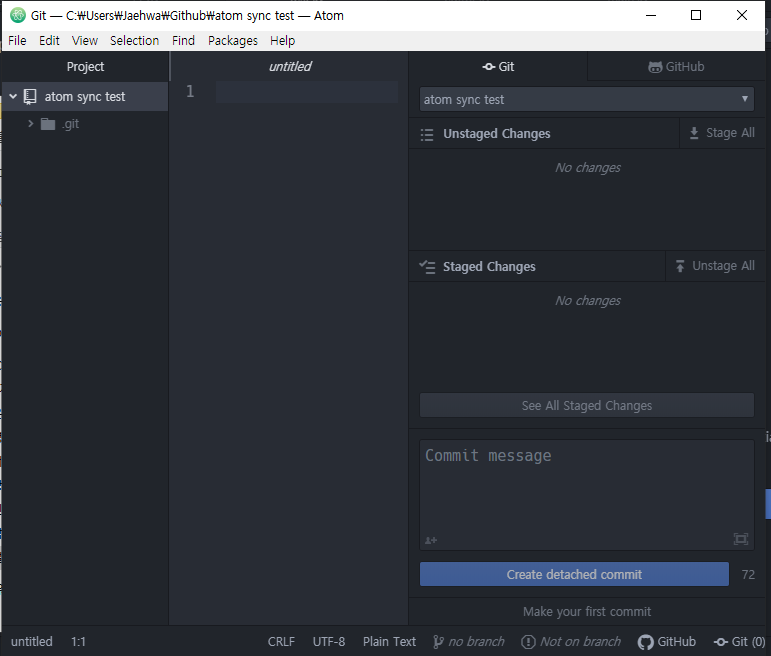
테스트용 글을 적습니다.
그리고 우리가 만든 atom sync test 폴더에 저장합니다.
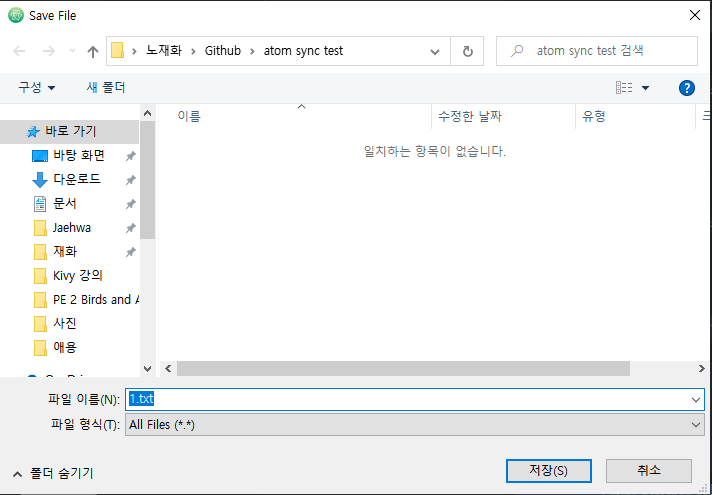
다음과 같이 Unstaged Changes에 해당 파일이 생깁니다.
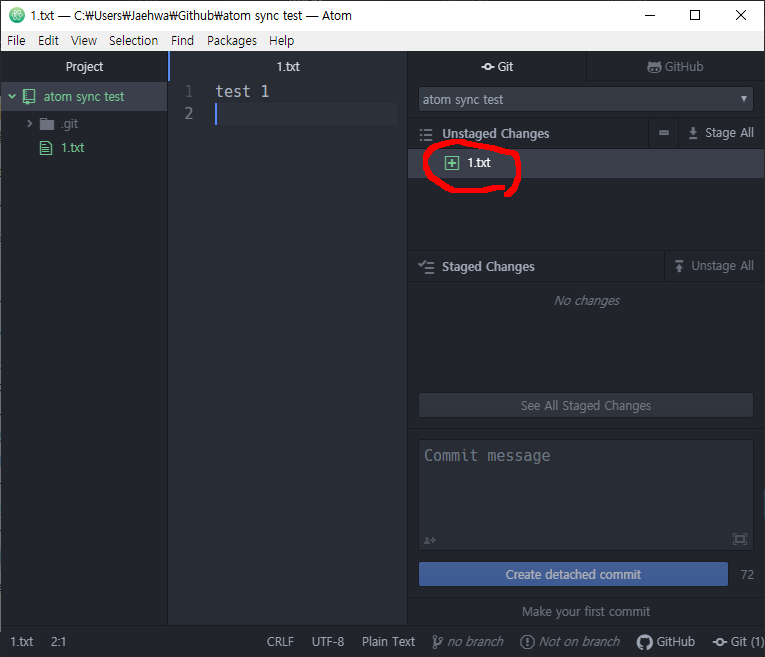
Unstaged Changes는 변경된 사항이 있기는 하지만, 버전 관리를 하지 않겠다는 뜻입니다.
이걸 더블클릭하거나 Stage All 버튼을 누르면, 아래 Staged Changes로 옮겨집니다.
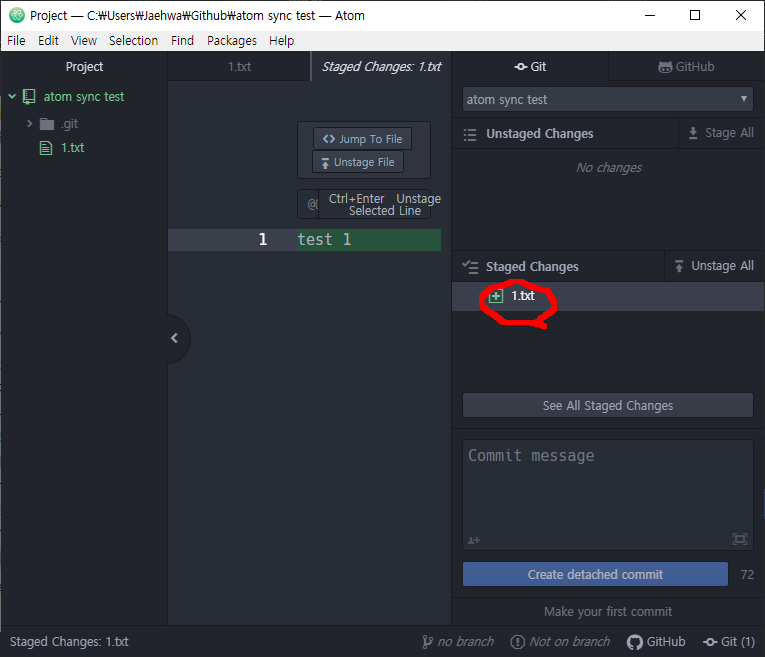
이제, Commit message에 버전 이름을 입력합니다.
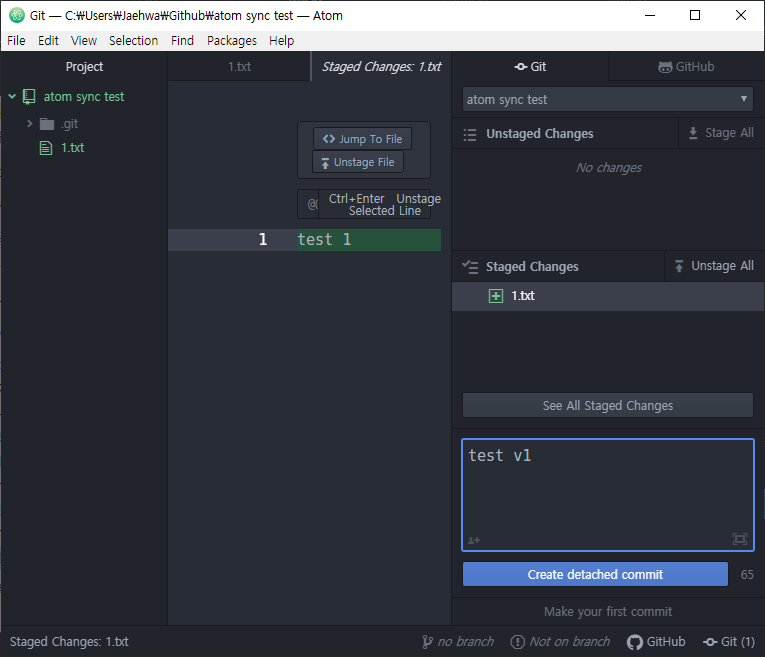
Create detached commit을 누릅니다.
그러면, 이러한 경고문이 나옵니다.
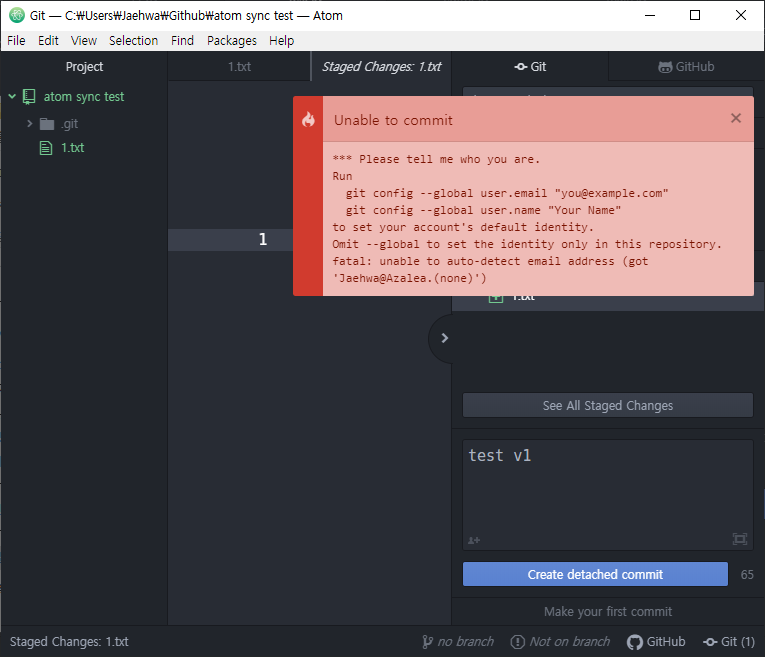
이것은 우리가 누구인지를 알려주지 않았기 때문에 어디에 올려야 할지 몰라서 그렇습니다.
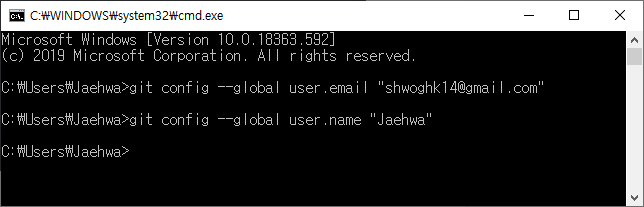
cmd 창을 띄워줍니다.
경고문에 적힌 것을 그대로 적어줍니다.
git config --global user.email에는 자신의 github 가입 이메일 주소를,
git config --global user.name에는 자신의 이름을 입력합니다.
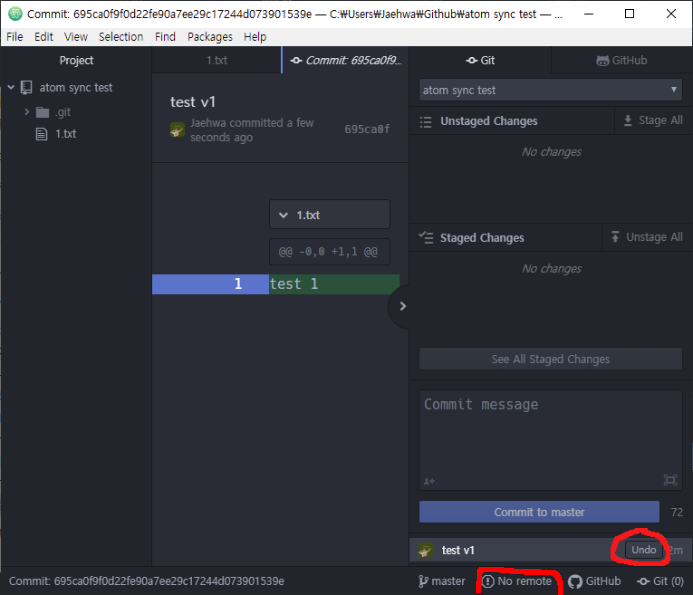
그다음 다시 Create detached commit을 누르면, 아래의 화면이 나옵니다.
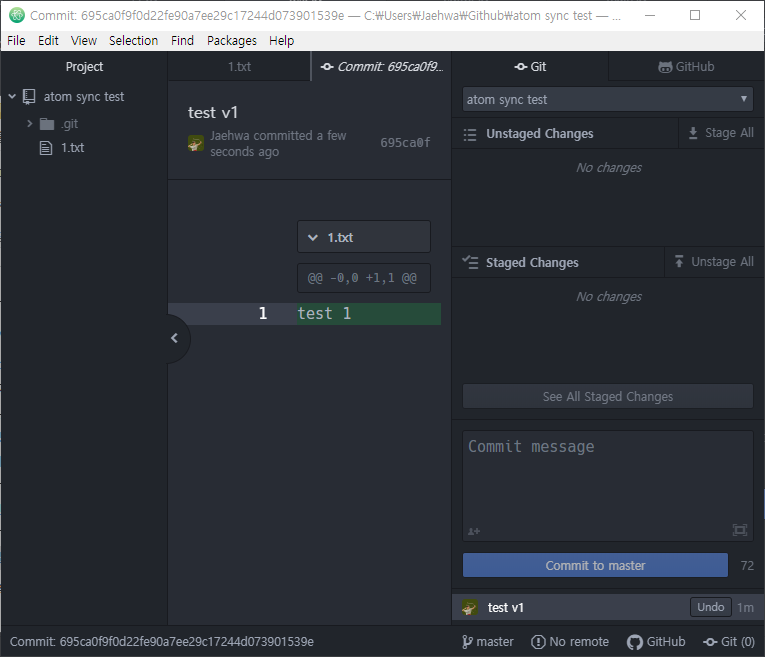
수정이 필요하면, Undo를 누릅니다.
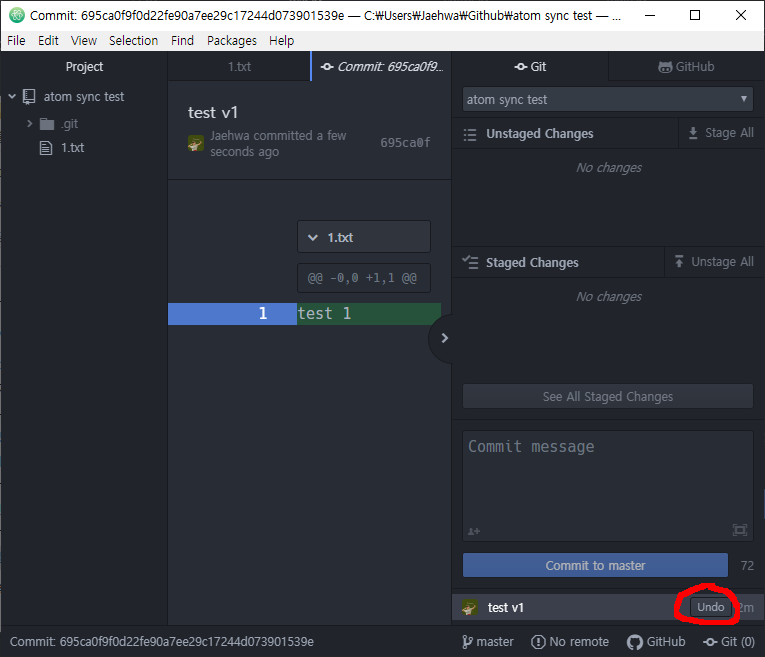
Commit to master은 비활성화된 상태입니다.
그 이유는 origin 원격 저장소가 없기 때문입니다.
원격 저장소를 만들러 갑시다.
github 홈페이지로 돌아와서, New를 누릅니다.
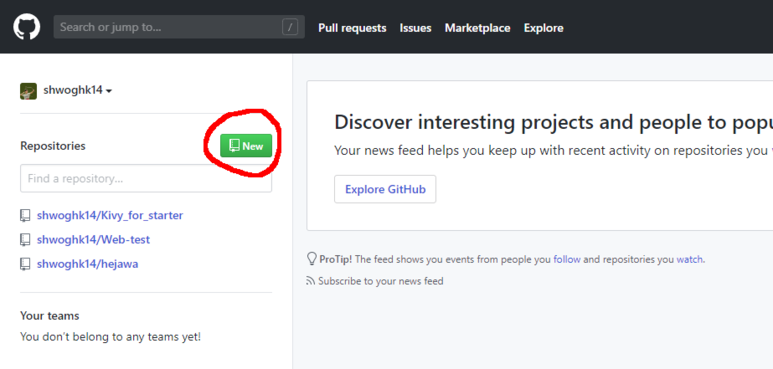
Repository를 만드는 화면이 나옵니다.
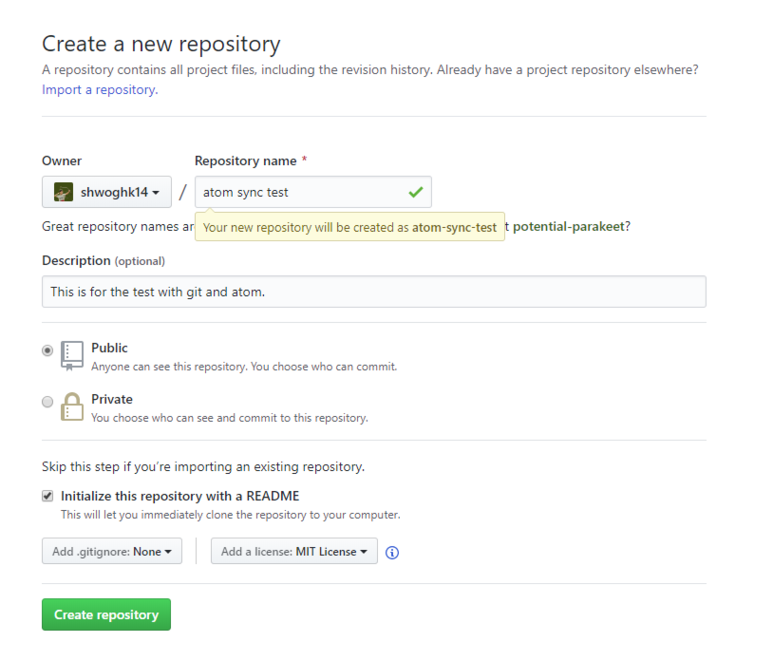
Repository name은 우리가 만든 로컬 이름과 헷갈리지 않게 동일하게 해줍니다.
Description은 설명을 적어줍니다.
Public은 모든 사용자가 내 코드를 볼 수 있는 것이고,
Private는 나 또는 특정 몇몇만 볼 수 있게 만드는 것입니다.
Initialize this repository with a README는 README라는 파일을 만들겠다는 것입니다.
.gitignore은 버전 관리를 하지 않는 파일들을 선택하는 것입니다.
License는 어떠한 라이선스로 배포할 것인지를 나타냅니다. 저는 MIT를 선택했습니다.
(MIT는 모두에게 공개하는 라이선스)
다 선택이 끝나면, Create repository를 누릅니다.

자, github에 원격 저장소(remote repository)가 만들어졌습니다.
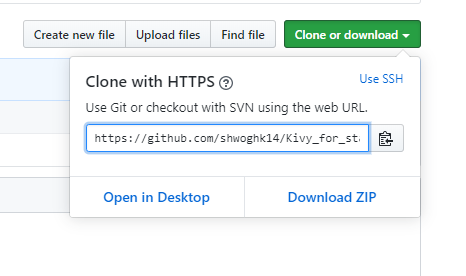
Clone or download를 눌러줍니다.
그리고 아래의 주소를 복사합니다.

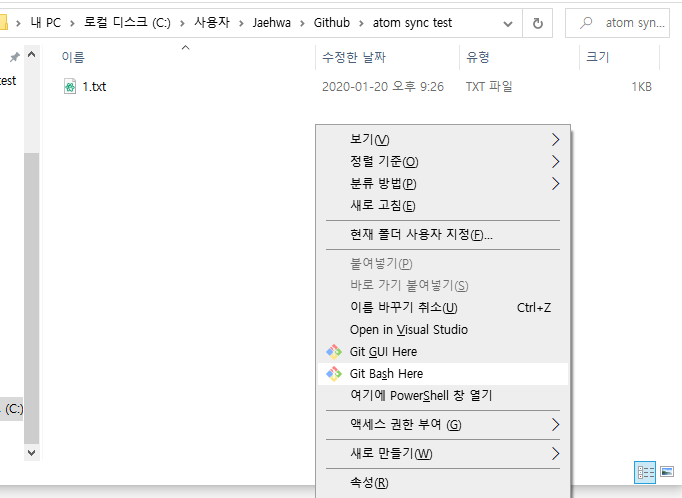
우리의 컴퓨터(Local repository)로 와서, 마우스 우 클릭 - Git Bash Here를 누릅니다.
Git bash에 git remote 명령어를 칩니다.
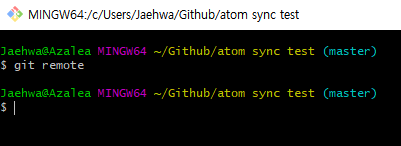
아무것도 나오지 않습니다.
여기에 원격 저장소를 추가해 줍니다. (아까 복사한 주소를 넣어줍니다.)
git remote add [별명] [url]
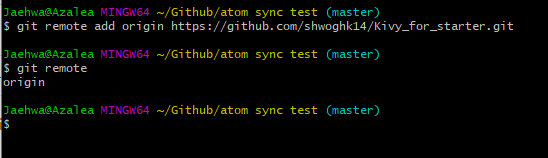
origin은 뒤의 url에 대한 별명입니다.
다시 git remote를 치면, origin이 추가된 것을 볼 수 있습니다.
다시 Atom으로 돌아오면, 이제 No remote 상태가 우리가 원격 저장소를 만들면서 설정한 Publish로 변경된 것을 볼 수 있습니다.
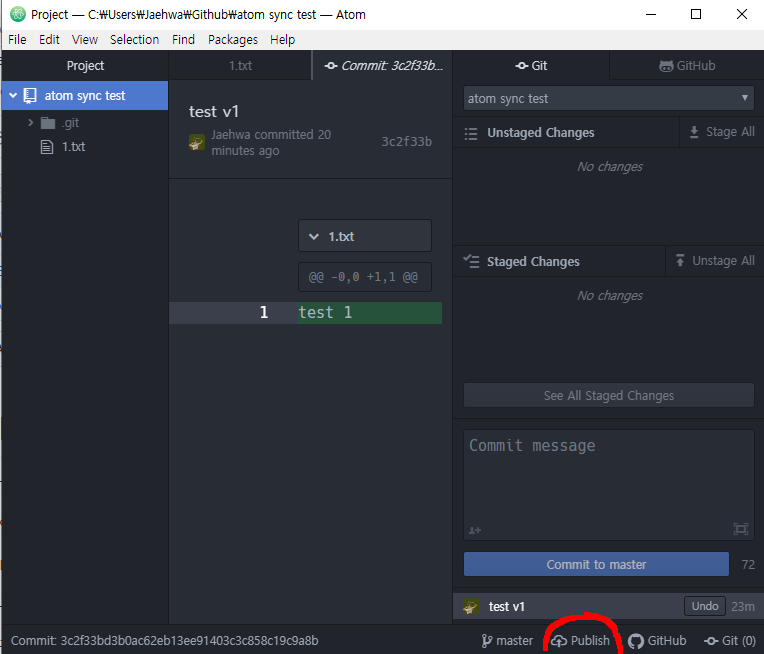
이제, 저 버튼을 누릅니다.
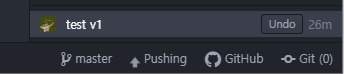
Pushing이라는 상태가 됩니다.
그리고 이런 로그인 창이 나옵니다.

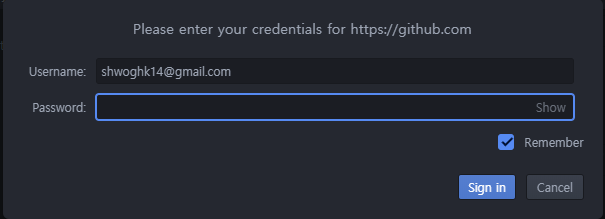
비밀번호를 입력하고 기다리면, 다음과 같은 경고가 뜹니다.
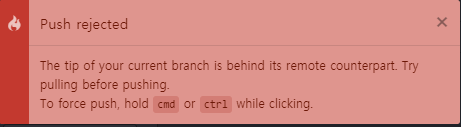
원격 저장소에 있는 LICENSE와 README.md가 로컬 저장소에는 없는 상태입니다.

그런데, 로컬에서 PUSH를 하게 되면, 로컬의 상태를 덮어 씌우게 되는 것으로 LICENSE와 README.md 파일은 사라집니다. 그래서 경고를 표시한 겁니다.
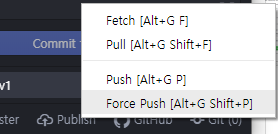
사라져도 상관없다면, Force Push 기능을 사용합니다.
마우스 우 클릭 - Force Push
한 번 더 경고 창이 나타납니다.
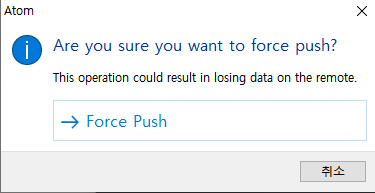
누르면, Pushing이 진행됩니다.

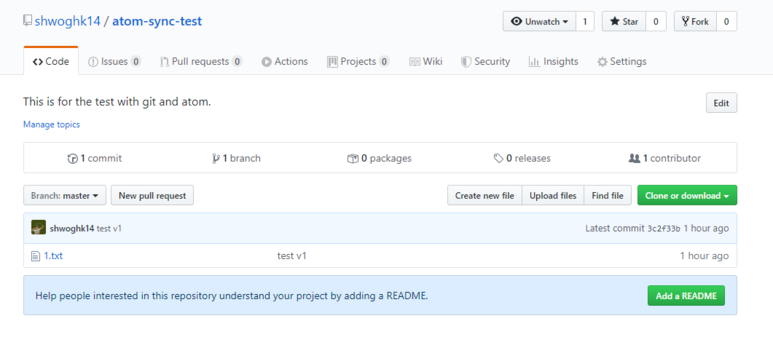
그러면, 원격 저장소의 내용이 다음과 같이 변경된 것을 볼 수 있습니다.
연동이 끝났습니다.
끝.
운영체제: Windows 10 Home x64 1909
기획: Atom으로 Git 사용하기.
github 공식 홈페이지에 접속합니다.https://github.com/
아이디가 있으면 Sign in, 아이디가 없으면 Sign up을 눌러줍니다.
Atom으로 돌아옵니다.
Git을 누르고, Create repository를 누릅니다.
적당한 폴더를 만들고, 경로를 입력합니다.
잠시 후, 로컬용 Git이 만들어집니다.
테스트용 글을 적습니다.
그리고 우리가 만든 atom sync test 폴더에 저장합니다.
다음과 같이 Unstaged Changes에 해당 파일이 생깁니다.
Unstaged Changes는 변경된 사항이 있기는 하지만, 버전 관리를 하지 않겠다는 뜻입니다.
이걸 더블클릭하거나 Stage All 버튼을 누르면, 아래 Staged Changes로 옮겨집니다.
이제, Commit message에 버전 이름을 입력합니다.
Create detached commit을 누릅니다.
그러면, 이러한 경고문이 나옵니다.
이것은 우리가 누구인지를 알려주지 않았기 때문에 어디에 올려야 할지 몰라서 그렇습니다.
cmd 창을 띄워줍니다.
경고문에 적힌 것을 그대로 적어줍니다.
git config --global user.email에는 자신의 github 가입 이메일 주소를,
git config --global user.name에는 자신의 이름을 입력합니다.
그다음 다시 Create detached commit을 누르면, 아래의 화면이 나옵니다.
수정이 필요하면, Undo를 누릅니다.
Commit to master은 비활성화된 상태입니다.
그 이유는 origin 원격 저장소가 없기 때문입니다.
원격 저장소를 만들러 갑시다.
github 홈페이지로 돌아와서, New를 누릅니다.
Repository를 만드는 화면이 나옵니다.
Repository name은 우리가 만든 로컬 이름과 헷갈리지 않게 동일하게 해줍니다.
Description은 설명을 적어줍니다.
Public은 모든 사용자가 내 코드를 볼 수 있는 것이고,
Private는 나 또는 특정 몇몇만 볼 수 있게 만드는 것입니다.
Initialize this repository with a README는 README라는 파일을 만들겠다는 것입니다.
.gitignore은 버전 관리를 하지 않는 파일들을 선택하는 것입니다.
License는 어떠한 라이선스로 배포할 것인지를 나타냅니다. 저는 MIT를 선택했습니다.
(MIT는 모두에게 공개하는 라이선스)
다 선택이 끝나면, Create repository를 누릅니다.
자, github에 원격 저장소(remote repository)가 만들어졌습니다.
Clone or download를 눌러줍니다.
그리고 아래의 주소를 복사합니다.
우리의 컴퓨터(Local repository)로 와서, 마우스 우 클릭 - Git Bash Here를 누릅니다.
Git bash에 git remote 명령어를 칩니다.
아무것도 나오지 않습니다.
여기에 원격 저장소를 추가해 줍니다. (아까 복사한 주소를 넣어줍니다.)
git remote add [별명] [url]
origin은 뒤의 url에 대한 별명입니다.
다시 git remote를 치면, origin이 추가된 것을 볼 수 있습니다.
다시 Atom으로 돌아오면, 이제 No remote 상태가 우리가 원격 저장소를 만들면서 설정한 Publish로 변경된 것을 볼 수 있습니다.
이제, 저 버튼을 누릅니다.
Pushing이라는 상태가 됩니다.
그리고 이런 로그인 창이 나옵니다.
비밀번호를 입력하고 기다리면, 다음과 같은 경고가 뜹니다.
원격 저장소에 있는 LICENSE와 README.md가 로컬 저장소에는 없는 상태입니다.
그런데, 로컬에서 PUSH를 하게 되면, 로컬의 상태를 덮어 씌우게 되는 것으로 LICENSE와 README.md 파일은 사라집니다. 그래서 경고를 표시한 겁니다.
사라져도 상관없다면, Force Push 기능을 사용합니다.
마우스 우 클릭 - Force Push
한 번 더 경고 창이 나타납니다.
누르면, Pushing이 진행됩니다.
그러면, 원격 저장소의 내용이 다음과 같이 변경된 것을 볼 수 있습니다.
연동이 끝났습니다.
끝.
카테고리: BlackSmith, Git
댓글
댓글 쓰기
궁금한 점은 댓글 달아주세요.
Comment if you have any questions.